Using self-adjustments in yoga classes is an effective way to support your students’ body awareness. Using their own hands to gain an understanding of where their bodies are in space will give students a stronger mind-body connection, and facilitate safer, more effective alignment. Self-adjustments in yoga benefit your students in several ways:
Everyone Gets One
As a teacher, you can only adjust one person at a time. But with the right cues, each student can provide themselves with a self-adjustment.
Self-Adjustments in Yoga are Empowering
Self-adjustments in yoga allow students to take control of their bodies. They can explore the pose in order to find their own alignment. This process of inquiry and ownership will give them them more confidence in their own abilities.
Self-Adjustments are Non-Invasive
Some students love being adjusted by the teacher, while others recoil at the thought. We all have different personal space boundaries (based on culture, upbringing, and personal history). Respecting these boundaries will help you gain your students’ respect and trust. And a self-adjustment provides the tactile feedback of an adjustment without the risk of making students feel uncomfortable or even unsafe.
Self-Adjustments are One of the Best Forms of Education
Using their own hands helps students to gain a better understanding of the subtleties of alignment. Many students lack the proprioception (the ability to feel where the body is without looking) to gain an accurate sense of their position. For example, if you ask a student to square their hips in a lunge, they might feel like they’re doing so. But the heightened level of awareness they have in their hands means that placing hands on hips will give them a clearer sense of their body’s position. Kinaesthetic learners in particular benefit from self-adjustments in yoga. (Read more about learning styles and how to effectively address them).
Some Simple Yoga Self-Adjustments…
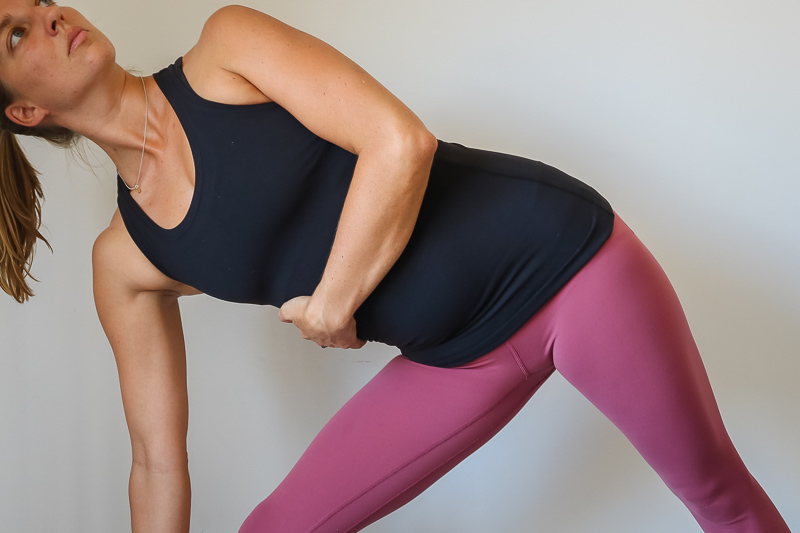
Trikonasana (Triangle Pose)
From Trikonasana wrap your top arm around your lower ribs. Use the top hand to guide your lower ribs forward, rotating your chest towards the ceiling.
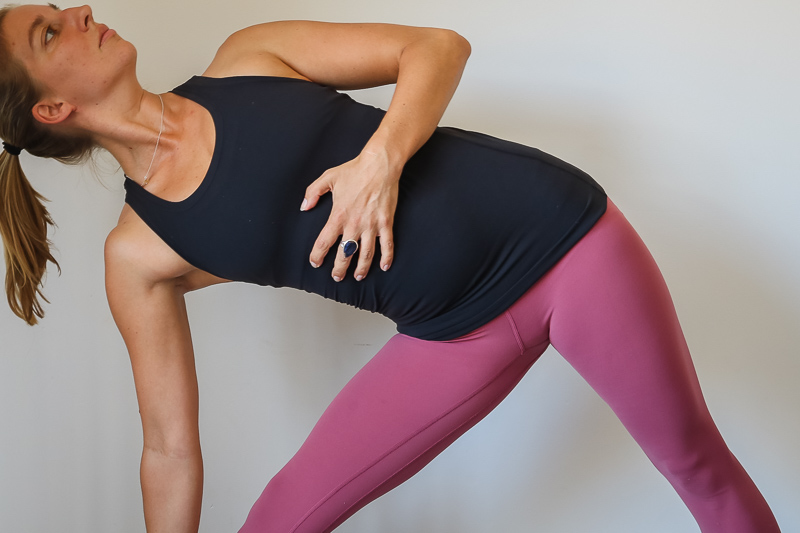
Tadasana (Mountain Pose)
Explore pelvic tilt by taking your hands to your hips (thumbs around the back and fingers around the front), or resting one hand on your lower belly and the other hand on your sacrum, as pictured. Tilt your pelvis forward and back, imaging the pelvis as a bowl of water. Each time you move into an anterior tilt you’re tipping water out the front; as you move into a posterior tilt you’re tipping water out the back. Then find neutral. You can use the same technique in standing postures such as Virabhadrasana II (Warrior II) and Utkata Konasana (Goddess Pose).


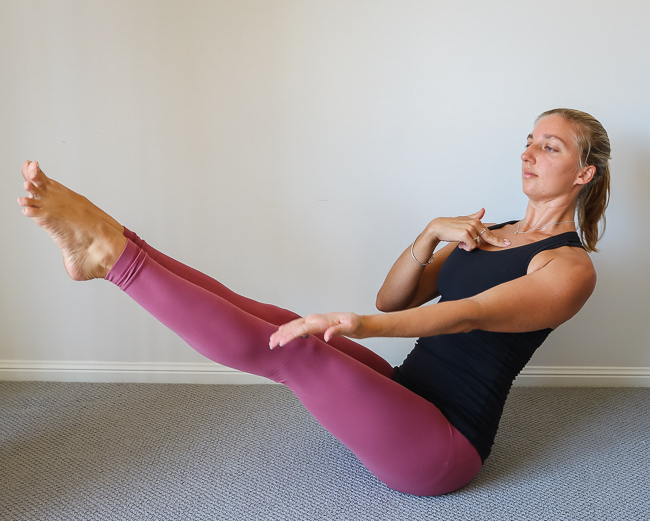
Navasana (Boat Pose)
Bring two fingertips to your sternum, and as you inhale press your sternum up into your fingers to lift your chest. This is a helpful technique for students who tend to collapse and round their backs.

Agnistambhasana (Fire log pose)
While sitting upright, hook your thumbs into your hips creases with your fingers pointing down the back of your thighs. Use your hands to externally rotate your thighs and ground your hips, and keep your hands there as you begin to fold forward. Once you’re in the pose, gently release your hands to the floor in front of you. (See more great self-adjustments for Agnistambhasana).



Hi there! Such a good post, thank you!